

All Grain, Sous Vide Instructions
Total Time - 4 weeks
| TIMES PER DAY | FIRST TIME | INTERMEDIATE | ADVANCED |
| BREW DAY | 4.5 HRS | 3.5 HRS | 2.5 HRS |
|
BOTTLING DAY (TWO WEEKS LATER) |
2 HRS | 1.5 HRS | 45 MIN |
The Beers Will Be Carbonated and Ready 2 Weeks After Bottling
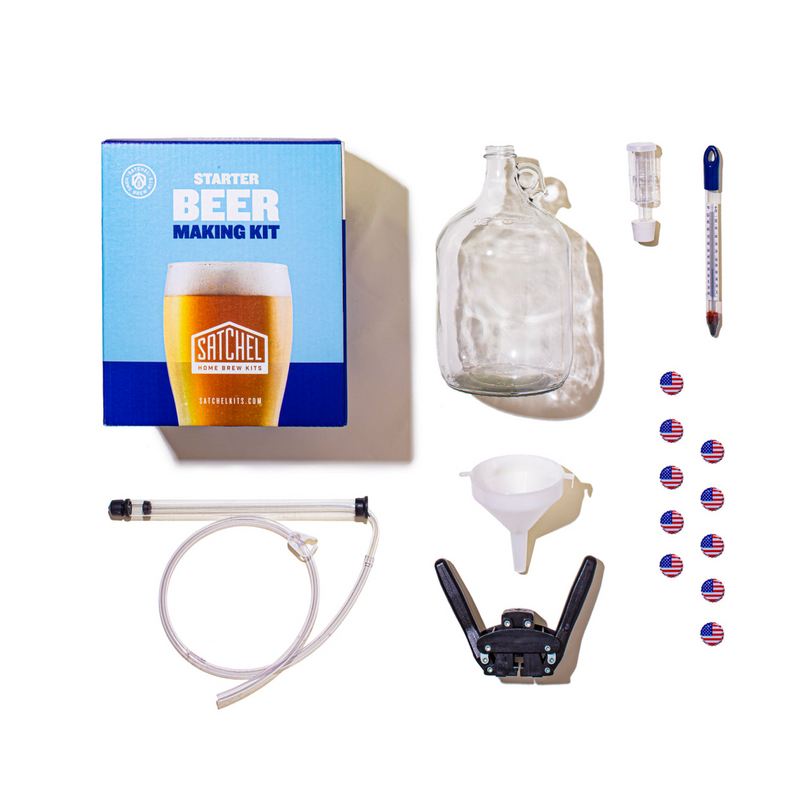
BREWING EQUIPMENT:
8 quart pot with a lid - Buy Here
4 quart pot with a lid - Buy Here
8-12 quart container - Buy Here
Strainer (included with the Premium Kit) - Buy Here
Tubing
Sanitizer
BOTTLING EQUIPMENT:
8 quart pot with a lid
Small saucepan with a lid
Mini Auto-Siphon
Sanitizer
10 Bottles (non-twist off or swing top such as Grolsch) 10 Bottle caps (if non-twist off)
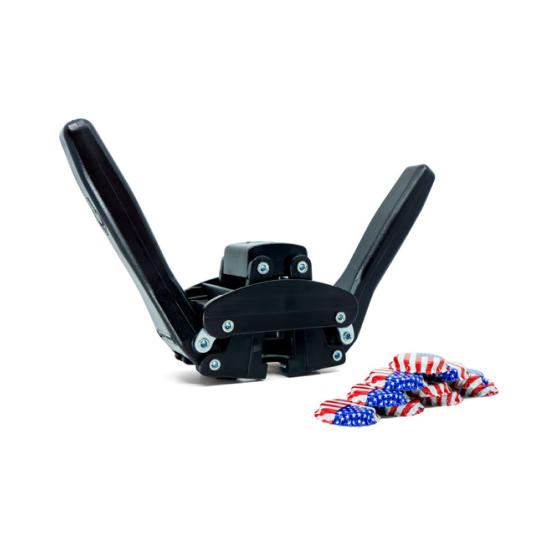
Bottle Capper (if non-twist off)
THE MASH
1. Over high heat in an 8 quart pot, bring 4 quarts of water to 160°F - turn heat off.
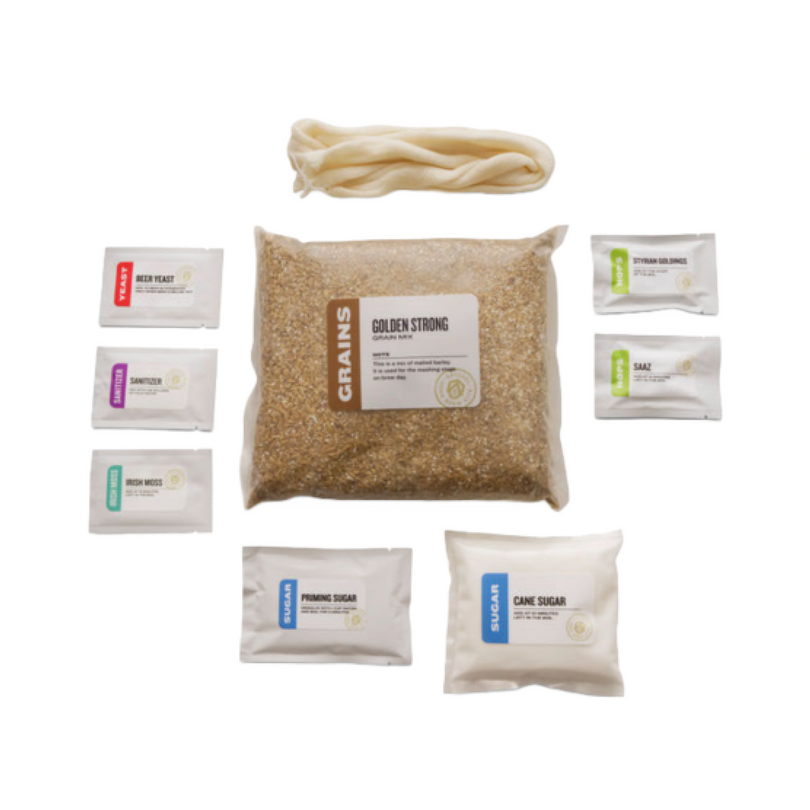
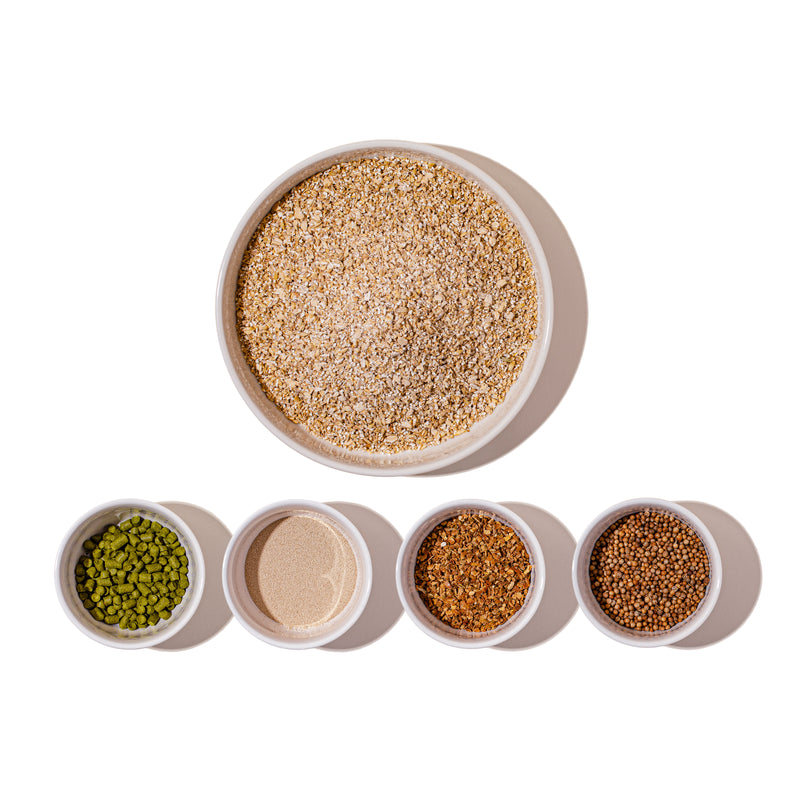
2. While the water is heating, pour the grains into the muslin bag and tie it off. Alternatively, you can use binder clips to secure the edges of the bag to the edges of the pot.
3. Once the temperature is at 160°F, drop the tied off muslin bag and move it around/poke at it with a large spoon to make sure there are no dry spots. If clipping the bag to the pot, stir in the grains, making sure there are no clumps and that nothing sticks to the bottom of the bag - this is called mashing in.
4. Adjust the sous vide temperature to 156°F and set a timer for 1 hour. This is our mash temperature and the grains should naturally bring the water to 156°F once they have been added.
5. Check on the grains and stir them every 15 minutes. The sous vide will do a good job circulating the water, but it is important to be certain the grains are well covered. Start the next step 40 minuts into the mash.
6. Heat 3 quarts of water in a separate pot to 170°F, then cover with a lid.
7. Once your grains have steeped for 1 hour, raise the temperature of the sous vide to 170°F while stirring constantly. Once at 170°F , stir for 3 min-utes. This process is called mashing out and stops the enzymatic function that breaks down the grain’s starches to sugars. The main benefit to stopping this process is that it will prevent the grains from stick-ing together in the next step. Don’t go over 170°F, or you will release undesired tannins which will nega-tively impact the flavor. Also, don’t squeeze the grain bag - this too will release tannins.
THE SPARGE
9. Hold the strainer in one hand and carefully remove the grain bag from the water with the other hand, being sure not to spill. Place the strainer across the top of the pot and the grain bag into the strainer
9. Ensure that the water heated separately is no lower than 168°F and no higher than 170°F and pour it slowly and evenly over the grains. As the water rises, you may need to lift the strainer so that the grains are not sitting in the water. This process is called sparging. You are rinsing the grains to ensure that as much sugar is extracted as possible. If you have another large pot, you can recycle the liquid through the grains a few times by setting the strainer up the same way over a different pot and pouring the collected liquid over. This will help make sure you extract as much of the sugar as possible
10. Once you are done collecting the liquid, you are left with what is called wort. This is the basis for your final product and is considered unfermented beer - congrats!

THE BOIL
11. Bring the wort to a boil over high heat, watching the pot to ensure it does not boil over. In the case of aggressive foaming, turn the heat down and blow on the foam or stir the wort until the foam goes down
12. At the start of your boil, set a timer for 60 minutes and follow the hop schedule below. Stir the wort after each hop addition with a slotted spoon.
Hop Schedule
- When the boil starts, add the Perle hop packet
- At 45 minutes left in the boil, add one packet of your Cascade hops
- At 15 minutes left in the boil, add your Irish Moss - this is a clarifying agent that helps proteins precipitate to the bottom of the kettle to make your beer clearer
- At 2 minutes left in the boil, make an ice bath in your kitchen sink
- At the end of your 60 minute boil, add the other half of your Cascade hops
13. Once your boil is done and you have added your final round of hops, turn the heat off and mix the wort with the same slotted spoon you used through the boil for 1 minute. This is called whirlpooling and will help the hop flavors get picked up into the wort.

CHILLING THE WORT
14. Carefully move the pot of wort into your ice bath and stir for 2 minutes with the same spoon being careful to avoid getting anything into the wort. This is the beer’s most vulnerable stage. Any amount of bacteria can get into the beer and ruin the batch. We are stirring here to dissipate the heat quickly.
15. After stirring for two minutes, cover the beer and let it sit, occasionally stirring the ice bath (not the beer!) and rotating the pot in the opposite direction.
16. Pour one sanitizer packet into a container that can hold 6-8 quarts of water and fill with 5 quarts of water. Stir to dissolve. Keep in mind that this sanitizer takes 1 minute of contact to sanitize something. Set two cups of sanitizer aside and cover with plastic wrap for step 27 in 3 days.
17. Sanitize the glass fermenter by filling it with 2 inches of sanitizer solution and shaking it vigorously for 1 minute while covering the opening with one hand until everything is covered in foam. Place upside down in a drying dish rack or on clean paper towels against a wall. All of the foam will not go away, this is fine and will not harm the beer.
18. Sanitize the rubber stopper, tubing, funnel, and a strainer and place to dry.
19. Sanitize the tip of your thermometer and check the beer. Allow it to sit in the ice bath until the beer reaches 75°F, being sure to sanitize the thermometer between each time you check.

PITCHING THE YEAST
20. Once the wort reaches 75°F, set the glass fermenter on the floor and place the funnel into the opening, put a strainer over the funnel. Carefully pour the beer until it reaches a little over the words that say “One Gallon”. Avoid getting the sediment at the bottom of the pot into the fermenter, but do not stress if you do. If the beer level is below the “One Gallon” mark, bring it to the correct level with cold tap water from a faucet. Make sure the mouth of the fermenter does not touch the faucet.
Pitching the Yeast
21. Remove the funnel and carefully pour the contents of the yeast packet into the carboy (fermenter). Insert the rubber stopper.
22. Dip your hand into the sanitizer and then cover the hole of the rubber stopper - shake aggressively to agitate the yeast. The idea is to break up the yeast and introduce it to oxygen and wort.
23. Insert the tubing into the rubber stopper. It is easiest to remove the stopper (with clean hands), insert the tubing, and put the stopper back.
24. Fill a cup with sanitizer and insert the open end of the tube into the water.
25. Set into a closet for two weeks. Keep the beer in the dark for the entire time. Occasionally peeking is ok.

Three Days Later
26. After three days, use the reserved sanitizer to sanitize and fill the 3 piece airlock. Slowly pour the sanitizer in until it reaches the fill line, then replace the tubing with it.

BOTTLING INSTRUCTIONS
Bottling Equipment:
8 quart pot with a lid
Small saucepan with a lid
8-12 quart container
Mini Auto-Siphon
Tubing
Measuring cup
Sanitizer
Slotted Spoon
10 Bottles (non-twist off or swing top such as Grolsch)
10 Bottle caps (if non-twist off)
Bottle Capper (if non-twist off)
Preparing the Priming Solution
1. Measure one cup of cold tap water and pour it into a small sacepan.
2. Bring the water to a boil and stir in the sugar. Reduce the heat to maintain a light rolling boil to avoid scorching the sugar and boil for 5 minutes.
3. After 5 minutes, turn off the heat, cover the pot, and set aside to cool. The liquid must be at room temperature for bottling, so it is advantageous to do this step well before you start bottling.
4. While the liquid is cooling, move the fermenter to where you will bottle. You want the fermenter to be about 12 inches above the pot you will be siphoning the beer into. In most cases, putting the pot in an empty kitchen sink and the fermenter on a counter will be sufficient. You want to move the fermenter early so any kicked up sediment has time to settle.
Preparing for Bottling
5. Make a bath in a sink with dish soap and hot water and soak 10 non-twist off bottles for 20 minutes.
6. While the bottles are soaking, prepare the sanitizer in an 8-12 quart container by dissolving one sanitizer packet with 5 quarts of cold water
7. Rinse the bottles with warm water clear of all soap suds and sanitize for 1 minute at a time by dunking each bottle in the sanitizer until bubbling stops. Set the bottles upside down on a dish drying rack or clean paper towels against a wall.
8. Sanitize the auto-siphon, tubing, 10 bottle caps, and a slotted spoon. Set aside to dry. If there is residual foam, don’t worry. Sanitize the 8 quart pot by pouring in 1-2 inches of water, covering the pot and swirling/shaking it to ensure that the sanitizer covers all surfaces.
Combining the Beer and Priming Solution
9. Once the sugar solution is at room temperature, begin to siphon the beer into the sanitized pot by inserting the base of the syphon with one hand about half way into the fermenter. Be sure not to get too close to the bottom of the pot.
10. With the other hand, make sure the clamp is open, ensure the end of the tubing is facing the sanitized pot, and slowly lift the inner portion of the syphon and press it down until the liquid starts to flow - it may take a few pumps to get going. This can be a little tricky, so check out the video here! Video
11. As the beer level in the pot gets to about 2 inches, slowly pour in the sugar solution. Try not to splash because the beer is very sensitive to oxidation and contamination at this stage.
Siphoning into the Bottles
15. Line up your bottles in the sink and siphon the beer from the bottling pot into the bottles using the auto siphon in the same way. Once the beer approaches half way up the bottle neck, click the bottling clamp into place. When the tube attached to the siphon is at the bottom of the next bottle, release it to start filling again.
16. Place a cap on each bottle. Use the capper to cap each beer individually by placing it over the cap/around the neck and firmly, but slowly swinging the handles down.
17. Once you are done capping, rinse the outside of the beer bottles with cold water, dry, affix any labels, and store the beers in a cool dark space for 2 weeks.
18. After 2 weeks, refrigerate your beer overnight and enjoy! Post your beer and tag @satchelbeerkits to be enrolled in our monthly recipe kit giveaway!
FERMENTER CLEANING
While there are many ways to clean a fermenter, we find that the most consistent method is to use a chemical called PBW - available here. The instructions below are for 10g PBW tablets, but the same instructions apply for roughly 1 tsp of PBW powder.
1. After bottling, rinse fermenter thoroughly with hot water. Most dirt will remain, but you want anything that is loose out.
2. Drop 1 tablet into the fermenter and fill with hot water. Once full, wait about 30 seconds for the foam to settle and top off to the brim with hot water.
3. Let sit for 25 minutes, shaking gently half way through.
4. After 25 minutes, rinse fermenter thoroughly with hot water. We suggest filling the fermenter and shaking vigorously several times and then filling to the top and dumping a final time.
5. Dry fermenter by placing it inverted in a dish rack or leaning it carefully against a wall with the opening resting on clean paper towels. Once dry, your fermenter should look brand new and be ready for your next brew!