THE MASH
Creating the Soul of Your Beer
The process of creating beer centers around extracting sugar from the grains, adding bittering and aroma qualities with hops, and producing alcohol, additional flavor, and carbonation with yeast. Though no one aspect of making beer is more important than the other, extracting sugars from the grains is essential for any of the other steps to work. The malted barley grains, or malt, is considered to be the soul of a beer.
To make barley usable for making beer, a few things need to take place. First, before the barley is considered brewable, it must be malted. The process of malting is an art in itself. To save time, this section provides a brief overview. If you want to learn more, click here.
The process of malting barley is centered around getting the naturally occurring enzymes and starches in each barley grain to be as abundant as possible. First, the grains are steeped in water for up to two days which jump starts the process of growth. Once the steeping process is completed, the grains are germinated which begins sprouting and opens the starch reserves. The germination process is stopped after about 5 days by way of kilning. If the grains were to continue growing, they would use all of the starch that we need to make beer. The kilning process also dries the grains and gives additional flavor and color.
Once the barley is malted, it is shipped to us whole. We crush it fresh which cracks the grain husks and exposes the starchy goodness inside.
As much as we love starch, it is useless to us until we can convert it to sugar. This is where the process of mashing comes in. Mashing is the process of using water at a specific temperature to convert the starches found in malted barley into usable sugars. Depending on the malt being used, different temperatures and times are used. For example, a lower mash temp results in lower sugar volume and a crisper mouthfeel, while a higher mash temp will result in higher sugar content and a fuller flavor.
Once the beer is done mashing, it is advantageous to stop the enzymatic production by raising the mash temp to 170°F - this process is called mashing out. Once at this temperature, the grains not only stop breaking down the starches, but they also tend to limit clumping. This is helpful in the next step when we run water through the grains.

THE SPARGE
Leave No Sugar Behind
After the mash and mashing out, it is time to ensure that all of the sugar trapped in and around the grains is extracted. The best way to do this is to place the grains in a strainer and run 170°F water through the grains, being sure to collect the water that passes through. In professional brewing, this process can go on for up to an hour with the liquid from the mash being recirculated over and over again through the grain husks until it runs clear.
Though we likely do not have this kind of equipment as we are starting out, you can still recirculate the liquid by pouring it back and forth between two pots through the grains in a strainer.
The remaining liquid at this stage is called wort. It is essentially unfermented beer and will serve as the body that will have hops and yeasts added to it.
THE BOIL
Adding the Character to Your Beer
Getting to the stage of having wort is a rewarding part of the brewing process. With all grain brewing (meaning no malt extract), it can be tricky to get the mash right and to do it consistently. Factors other than temperature must be considered, such as the PH of the water and the amount of sodium in the mash. Most serious brewers will invest in expensive equipment to make the process easier. However, by brewing as outlined in this guide, you will have a very concrete understanding of how to do it in the most basic way so that when you graduate to larger batches, you will understand the majority of the process.
Now, you are simply bringing the wort to a boil and adding various hops or other flavoring ingredients. Boils usually range between 60 and 90 minutes depending on the style of beer. For example, a beer using a pilsner grain will usually utilize a longer boil to break down a sulfuric compound that occurs during malting called DMS.
The timing of the hop additions is important because it will determine the type of flavor the hops will provide. Hops being added early in the boil will contribute more bittering qualities whereas hops added towards or after the end of the boil will have more aromatic qualities. Some styles of beer utilize a method called dry-hopping which is the process of adding hops to the fermenter after primary fermentation has taken place which usually adds floral taste and scent notes to a beer.
Another important result of the boil is that it concentrates the wort. When the beer is fermenting, you want there to be as much sugar as possible. If the beer is too watery, the yeast will not have enough food (sugar) and as such, you will end up with a low alcohol and potentially under carbonated beer.
Cooling The Beer
Escape the Heat
After the boil is finished, it is important to get the heat down as quickly as possible. There are a number of benefits to chilling the beer post boil quickly, the main two being: avoiding contamination and clearing up the beer (though clarity is truly a preference).
Beer is a hot spot for microorganisms because it is a very hospitable environment between the plentiful food (sugar) and warmth. The danger zone where bacteria will grow most rapidly is between 40°F and 140°F and chilling beer falls within this range.
We do in fact want one organism in our beer, yeast, while simultaneously needing to do everything possible to make sure there are no additional organisms, such as bacteria. When the boil is done, you want to ensure nothing gets into your beer, especialy in its most susceptible phase - before the yeast inoculates the wort.
By chilling the wort quickly, you are able to add the yeast quicker. Once yeast is active, it is harder for other bacteria to thrive.
Adding The Yeast
Start the Party
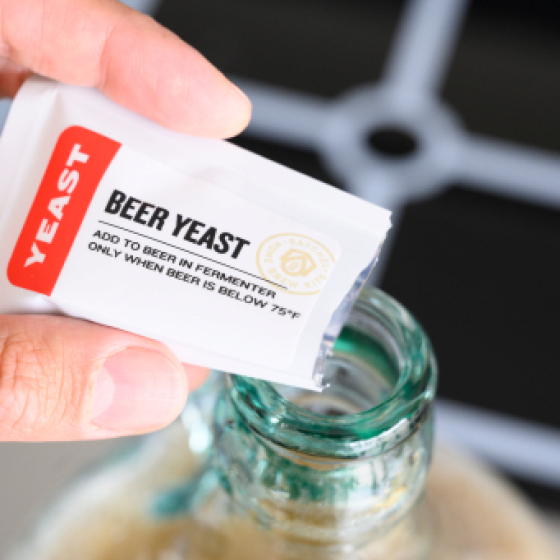
Once the wort is created, boiled, and chilled, the yeast does pretty much the rest of the heavy lifting. Yeast is sensitive to temperature, so it is important you are adding it to wort that is no greater than 75°F or you may kill it. In addition to sugar, yeast needs oxygen to get started. For this reason, it is helpful to use a funnel when transferring the wort from the boil kettle to a fermenter, as it will aerate the wort. Once you add the yeast to the beer, it is also helpful to vigorously shake the fermenter to introduce as much oxygen to the beer and yeast as possible.
Fermentation
The Creation of Alcohol
After you have oxygenated the beer and added the yeast, the yeast can be left to do its own thing. All yeasts perform best at different temperatures. For our entry-level recipes, we use mostly ale yeasts that function well between 65°F and 72°F. All yeasts like darkness and since our fermenters are clear, you should either cover them with a thick blanket (leaving the airlock exposed) or put them in a closet.
We have a mutually beneficial relationship with yeast. We give it sugary warm wort and in turn, as the yeast eats the sugar, it creates alcohol and CO2 as a byproduct - both are essential to beer. As home brewers, we will release the CO2 while keeping other elements out by way of a blow off tube for the first few days of fermentation and an airlock for the remainder of fermentation. Some professional breweries have been known to collect the C02 produced during fermentation and infuse it back into the beer when they carbonate it. As yeast completes its cycle of consuming the beer’s sugar, it starts to flocculate, or cluster together and fall out of suspension to the bottom of the fermenter. Certain yeasts will have higher flocculation rates than others. A yeast with a very high flocculation rate will leave a clearer beer than a yeast with a low flocculation rate such as a German Hefeweizen, which will maintain a hazier look.
Many brewers use more than one fermentation vessel or use one fermentation vessel that has a removable reservoir under it, allowing them to take out gunk from the bottom of the container. Gunk that settles to the bottom of the tank is mostly made up of hop matter and other byproducts of the brewing process - this is called trub. As fermentation goes on and trub settles to the bottom of the tank, yeast will fall on top once it completes the process of consuming the sugar.

Many experienced brewers feel that it is necessary to transfer beer after about 10 days of fermentation to a secondary fermenter. The reason people find this to be important is because it removes the beer from sitting on a yeast/trub cake which can cause off flavors. While this is important with higher gravity (more sugar) beers, we have found that in a one gallon format there is no noticeable benefit to transferring to a secondary fermenter. Also, by transferring a beer to a secondary fermenter, you are exposing it to oxygen which is bad for the beer after the yeast is pitched, as it will spoil beer faster and cause off flavors. It should be noted that this is our stance and that other brewers passionately feel that you should use a secondary fermenter. Ultimately, the choice is yours and brewing beer is all about finding your own style.
At the very end of the fermentation process, some brewers like to clear their beer one step further by using a method called cold crashing. Because suspended yeast can cause haziness in a beer, it can be advantageous for it to drop out of suspension. Yeast starts to go dormant at lower temperatures, so by chilling the beer at approximately 38°F to 45°F for 24 to 48 hours, you can clear the beer of most yeast. The term for this is “dropping bright”. While we need yeast in the next step, in our experience, there is still enough of a residual amount in suspension that it will activate once it is warmed again and introduced to more sugar. After your beer drops bright, it is safest to bring it back to room temp by leaving it out of the fridge for 5-8 hours before bottling so the yeast can re-activate when it is again united with sugar in the next step.
Bottling The Beer
The Introduction of Carbonation
There are two popular ways of carbonating a beer - bottle conditioning and force carbonating.
Bottle conditioning is the simpler method of carbonating in terms of equipment, where all you need to do is present a bit more sugar to the yeast and seal it in a container. Since yeast produces CO2 as it again consumes sugar and the CO2 in a sealed container has nowhere to go, the excess pressure is then reabsorbed into the beer making it carbonated. The process of adding the sugar to the beer is called priming. The cool thing with this method is that you can very specifically dial in the level of carbonation by measuring the temperature and volume of the beer along with the weight of the sugar. All beers use different carbonation levels. For example, a British Bitter is traditionally very low in carbonation with a CO2 vol of around 1.5 while a Belgian Triple traditionally has a CO2 vol of about 3.3. Once you know the carbonation level you like, it is easy to recreate it. One very important thing to avoid is over carbonating your beer by using too much sugar because it can be extremely dangerous. Even going after the 3.3 CO2 vol of the Belgian Triple above can potentially lead to bottles exploding especially if you are using thin, damaged, or old bottles. It is important to experiment with upping sugar levels incrementally. An exploding bottle, also known as a bottle bomb, has been described as being as loud as a 12 gauge shotgun and having enough force to send glass shards into a ceiling.
When bottle conditioning a beer, there are many different sugars you can use to activate the yeast. While these sugars range from regular table sugar to dry malt extract and honey, it is important to use one that is consistent. For example, if you and I were to buy a bottle of honey and compare them, the qualities of the honey will vary substantially. For this reason, priming with honey, though a great method, can yield inconsistent results unless you are weighing it rather than measuring it by volume, as you would with a tablespoon. There are certain sugars that dissolve easier than others, such as corn sugar, which is one of the more popular sugars used for priming beer.
The simplest format for bottle conditioning 1 gallon of beer is to dissolve x grams of corn sugar in 100ml of water and boil it for 5 minutes. Once the sugar solution has chilled to room temperature, you syphon the beer into a sanitized pot and mix in the room temp sugar solution. Each recipe we provide will include pre-measured sugar for your use.
Force carbonating is an alternative method of carbonating beer that involves a pressurizable vessel and an external source of CO2. The most common way of pressurizing beer is using a keg. With kegging, fermented beer is poured into a keg and then a CO2 line is connected which pressurizes the beer usually at about 15 PSI for a few days. Liquids absorb CO2 more efficiently when they are cold, so kegging usually takes place in a refrigerator. A massive advantage of force carbonating over bottle conditioning is that your beer can be ready in as little as two days. Also, when brewing larger volumes of beer, you can simply empty a fermenter into a keg in one shot and carbonate rather than filling many individual bottles.
Kegs are relatively inexpensive and are a great way to carbonate beer if you have the space. As someone who has been brewing in NYC and Boston apartments for a long time, I have found bottling to be more favorable. There is, however, an alternative: 1 gallon kegs such as the uKeg - buy here!
Post Bottling Chill
Party Time
Once the beer is fully carbonated, it is time to chill it. It is easy to get very excited and throw the beer in the freezer to speed up chilling, but it is important to note that gradual refrigeration will result in a more refreshing beer. It is highly suggested to chill a beer for 12-14 hours before drinking it for a number of reasons. First, it will help the CO2 absorb into the beer for a better head and more well rounded carbonation. Next, the lower temperature will help precipitate most proteins, tannins, and yeast particles left in suspension from the fermentation which will not only help clarity, but can also improve flavor slightly. Because these particles will fall to the bottom of the bottle, do not be surprised that there is sediment at the bottom of each bottle. This is a naturally occurring quality of bottle conditioned beers and the sediment is mostly yeast particles. This is even seen in a number of commercial beers such as Duvel, Orval, and Sierra Nevada Pale Ale.
It’s time to put this info to the test!
Post your beer and tag @satchelbeerkits to be enrolled in our monthly recipe kit giveaway!

